Home » Posts tagged 'computer repair'
Tag Archives: computer repair
Laptop Screen Repair
If you have a broken laptop screen, you can fix it in several ways. One way is to buy a replacement screen from the manufacturer’s authorized parts dealer or a third-party supplier.
A new laptop screen will usually cost anywhere from $50 to $250 dollars. But if you have an accidental damage protection plan, the replacement will be covered free of charge. The bezel is the frame that surrounds your laptop’s screen. Removing it allows you to access the screws that hold the LCD panel in place.
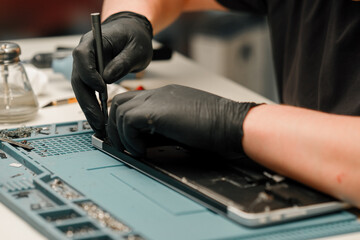
You’ll need a few tools to perform this repair: a small screwdriver, some thin metal blades or plastic spudgers, and a table or other flat surface. Your laptop may have hidden screws or cushioned screws that make it difficult to remove the bezel, so it’s best to work carefully and slowly.
First, locate the rubber screw covers along the front bezel of your screen assembly. These will typically be in each corner of the laptop, so you’ll need to prize them off.
Once the screws are exposed, unscrew them with your screwdriver. You’ll want to start from the bottom and work your way up the left and right sides, exposing the screws behind them.
Disconnecting the Video Connector. Most laptops have a video connector that connects to the back of the screen. This cable is usually secured to the back of the screen with tape, but if it’s not, you can disconnect it easily with a bit of gentle force.
Sometimes this connection will become loose and cause a display problem. One symptom of this is that the display flickers for a split second.
If this is the case, disconnect the video connector from the screen and reconnect it. This will help make sure that it’s not loose and will help you find the reason for the error.
If the issue persists, the laptop’s graphics card and/or motherboard may need to be replaced. In the meantime, you can check that this isn’t due to any peripherals attached to your computer, like a printer or a mouse.
Reinstalling the bezel is an important part of laptop screen repair. It gives you access to the screws that hold the new LCD panel in place and helps keep the screen aligned.
Removing the bezel is easy enough if you use a putty knife or other flat object. However, some laptops may have hidden screws or cushions that make this task more difficult.
Before you begin reinstalling the bezel, make sure that you have all of your tools ready. You should have a small-head magnetic screwdriver, as well as a safety pin or needle.
Once you have all of these, it is time to remove the eight bezel screws and their rubber screw covers. You will need to remove the four square screw covers along the inner lining of the bezel as well.
Next, connect the video cable to the new screen and secure it in place with the appropriate screws. Once this is done, you can reinstall the bezel and test it to ensure that it works.
Installing the New Screen. The next step in laptop screen repair is to install the new screen. Depending on the type of laptop you have, this may be a simple process or more complex.
First, you need to get the necessary tools and make sure they are in good working order. These tools can vary by manufacturer, but typically include one or two magnetic Philips head electronics screwdrivers (size 0 and 00), a Torx T5 screwdriver, a pair of tweezers, and a thin metal blade.
Once you have the appropriate tools, remove all the screws that secure the bezel around the laptop’s LCD panel. The bezel is usually secured with a series of screws and plastic snaps.
Then, disconnect the video connector from the back of the screen using a small screwdriver or tweezers. Be careful not to twist or slant the cable during this process.